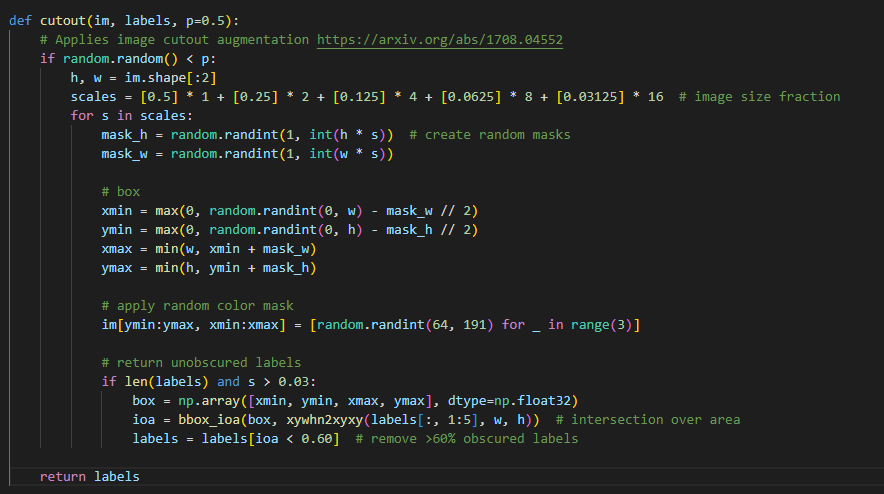
Yolo V5 Training 과정에 Cutout기법을 추가하는 과정을 진행했는데, Cutout 코드가 미리 구성이 되어 있어서 편하게 진행했습니다.
그래서 이 부분에서 간단히 dataloader와 yaml파일의 수정을 통해 augmentation을 유도하였습니다. 대부분이 주어져 있으니 참고 정도가 되면 좋겠습니다.
우선, augment과정이 기본적으로 어떻게 되어있는지 확인을 하면 좋습니다.
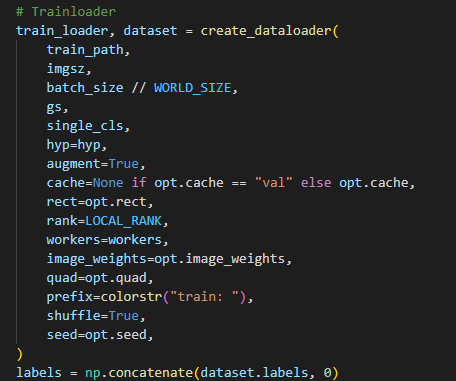
Train파일에서 augment 변수가 True로 되어있고, 해당 부분을 따라가면 됩니다.
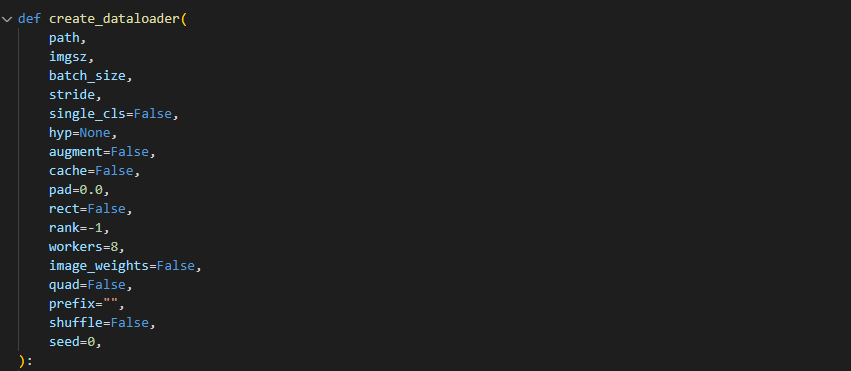
그래서 create_dataloader()부분을 찾으면 되고 , 따로 Dataloader.py라는 파일안에 들어있습니다.
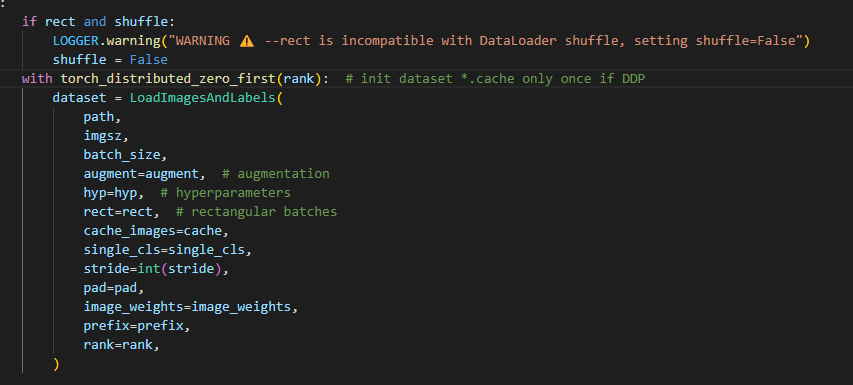
여기까지 왔으면 LoadimagesAndLabel부분에서 augmentation이 진행됨을 예측해볼 수 있고, 또 해당 부분을 따라가면 해당 클래스가 나오게 됩니다. 클래스의 __getitem__ 부분에서는 __len__ 의 반환값을 사용해 이미지를 연 다음 이미지 augmentation을 진행합니다.
def __getitem__(self, index):
        index = self.indices[index]  # linear, shuffled, or image_weights

        hyp = self.hyp
        mosaic = self.mosaic and random.random() < hyp["mosaic"] #Original code
        if mosaic:
            # Load mosaic
            img, labels = self.load_mosaic(index)
            shapes = None

            # MixUp augmentation
            if random.random() < hyp["mixup"]:
                img, labels = mixup(img, labels, *self.load_mosaic(random.choice(self.indices)))

        else:
            # Load image
            img, (h0, w0), (h, w) = self.load_image(index)

            # Letterbox
            shape = self.batch_shapes[self.batch[index]] if self.rect else self.img_size  # final letterboxed shape
            img, ratio, pad = letterbox(img, shape, auto=False, scaleup=self.augment)
            shapes = (h0, w0), ((h / h0, w / w0), pad)  # for COCO mAP rescaling

            labels = self.labels[index].copy()
            if labels.size:  # normalized xywh to pixel xyxy format
                labels[:, 1:] = xywhn2xyxy(labels[:, 1:], ratio[0] * w, ratio[1] * h, padw=pad[0], padh=pad[1])

            if self.augment:
                img, labels = random_perspective(
                    img,
                    labels,
                    degrees=hyp["degrees"],
                    translate=hyp["translate"],
                    scale=hyp["scale"],
                    shear=hyp["shear"],
                    perspective=hyp["perspective"],
                )

        nl = len(labels)  # number of labels
        if nl:
            labels[:, 1:5] = xyxy2xywhn(labels[:, 1:5], w=img.shape[1], h=img.shape[0], clip=True, eps=1e-3)

        if self.augment:
            # Albumentations
            img, labels = self.albumentations(img, labels)
            nl = len(labels)  # update after albumentations

            # HSV color-space
            augment_hsv(img, hgain=hyp["hsv_h"], sgain=hyp["hsv_s"], vgain=hyp["hsv_v"])

            # Flip up-down
            if random.random() < hyp["flipud"]:
                img = np.flipud(img)
                if nl:
                    labels[:, 2] = 1 - labels[:, 2]

            # Flip left-right
            if random.random() < hyp["fliplr"]:
                img = np.fliplr(img)
                if nl:
                    labels[:, 1] = 1 - labels[:, 1]

            # Cutouts
            labels = cutout(img, labels, hyp["cutout"])
            nl = len(labels)  # update after cutout

        labels_out = torch.zeros((nl, 6))
        if nl:
            labels_out[:, 1:] = torch.from_numpy(labels)

        # Convert
        img = img.transpose((2, 0, 1))[::-1]  # HWC to CHW, BGR to RGB
        img = np.ascontiguousarray(img)

        return torch.from_numpy(img), labels_out, self.im_files[index], shapes
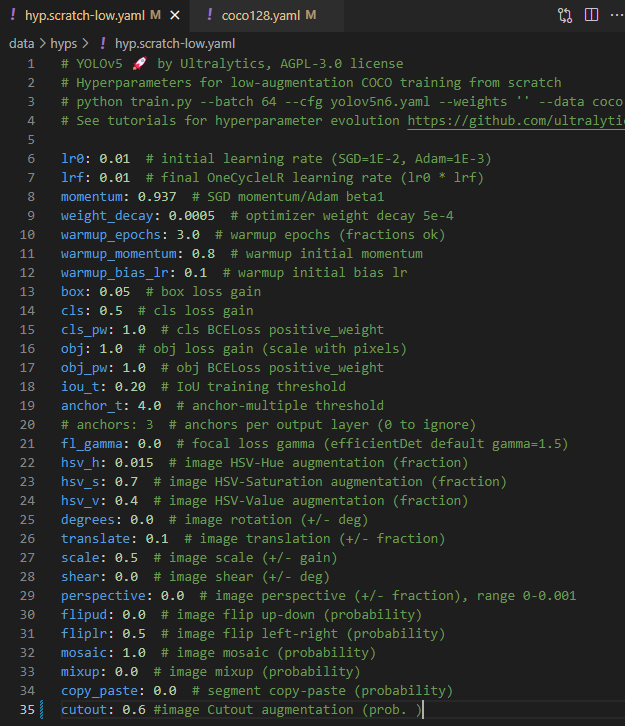
해당 부분의 Cutout이 구현되어 있었고, 주석처리를 해제하는것으로 간단하게 진행할 수 있었습니다. 바꾼 부분은 hyp["cutout']으로, 본래는 p =0.5 로 되어 확률 값을 나타내었습니다.
전 yaml파일에서 관리하고 싶어서 hyper parameter가 존재하는 yaml파일에서 해당 값을 추가하여 yaml을 수정하였습니다.
그렇게 해서 다시 학습을 진행시켜 보았고, cutout이 들어갔는지만을 확인하기 위해 COCO128로 해보았습니다.
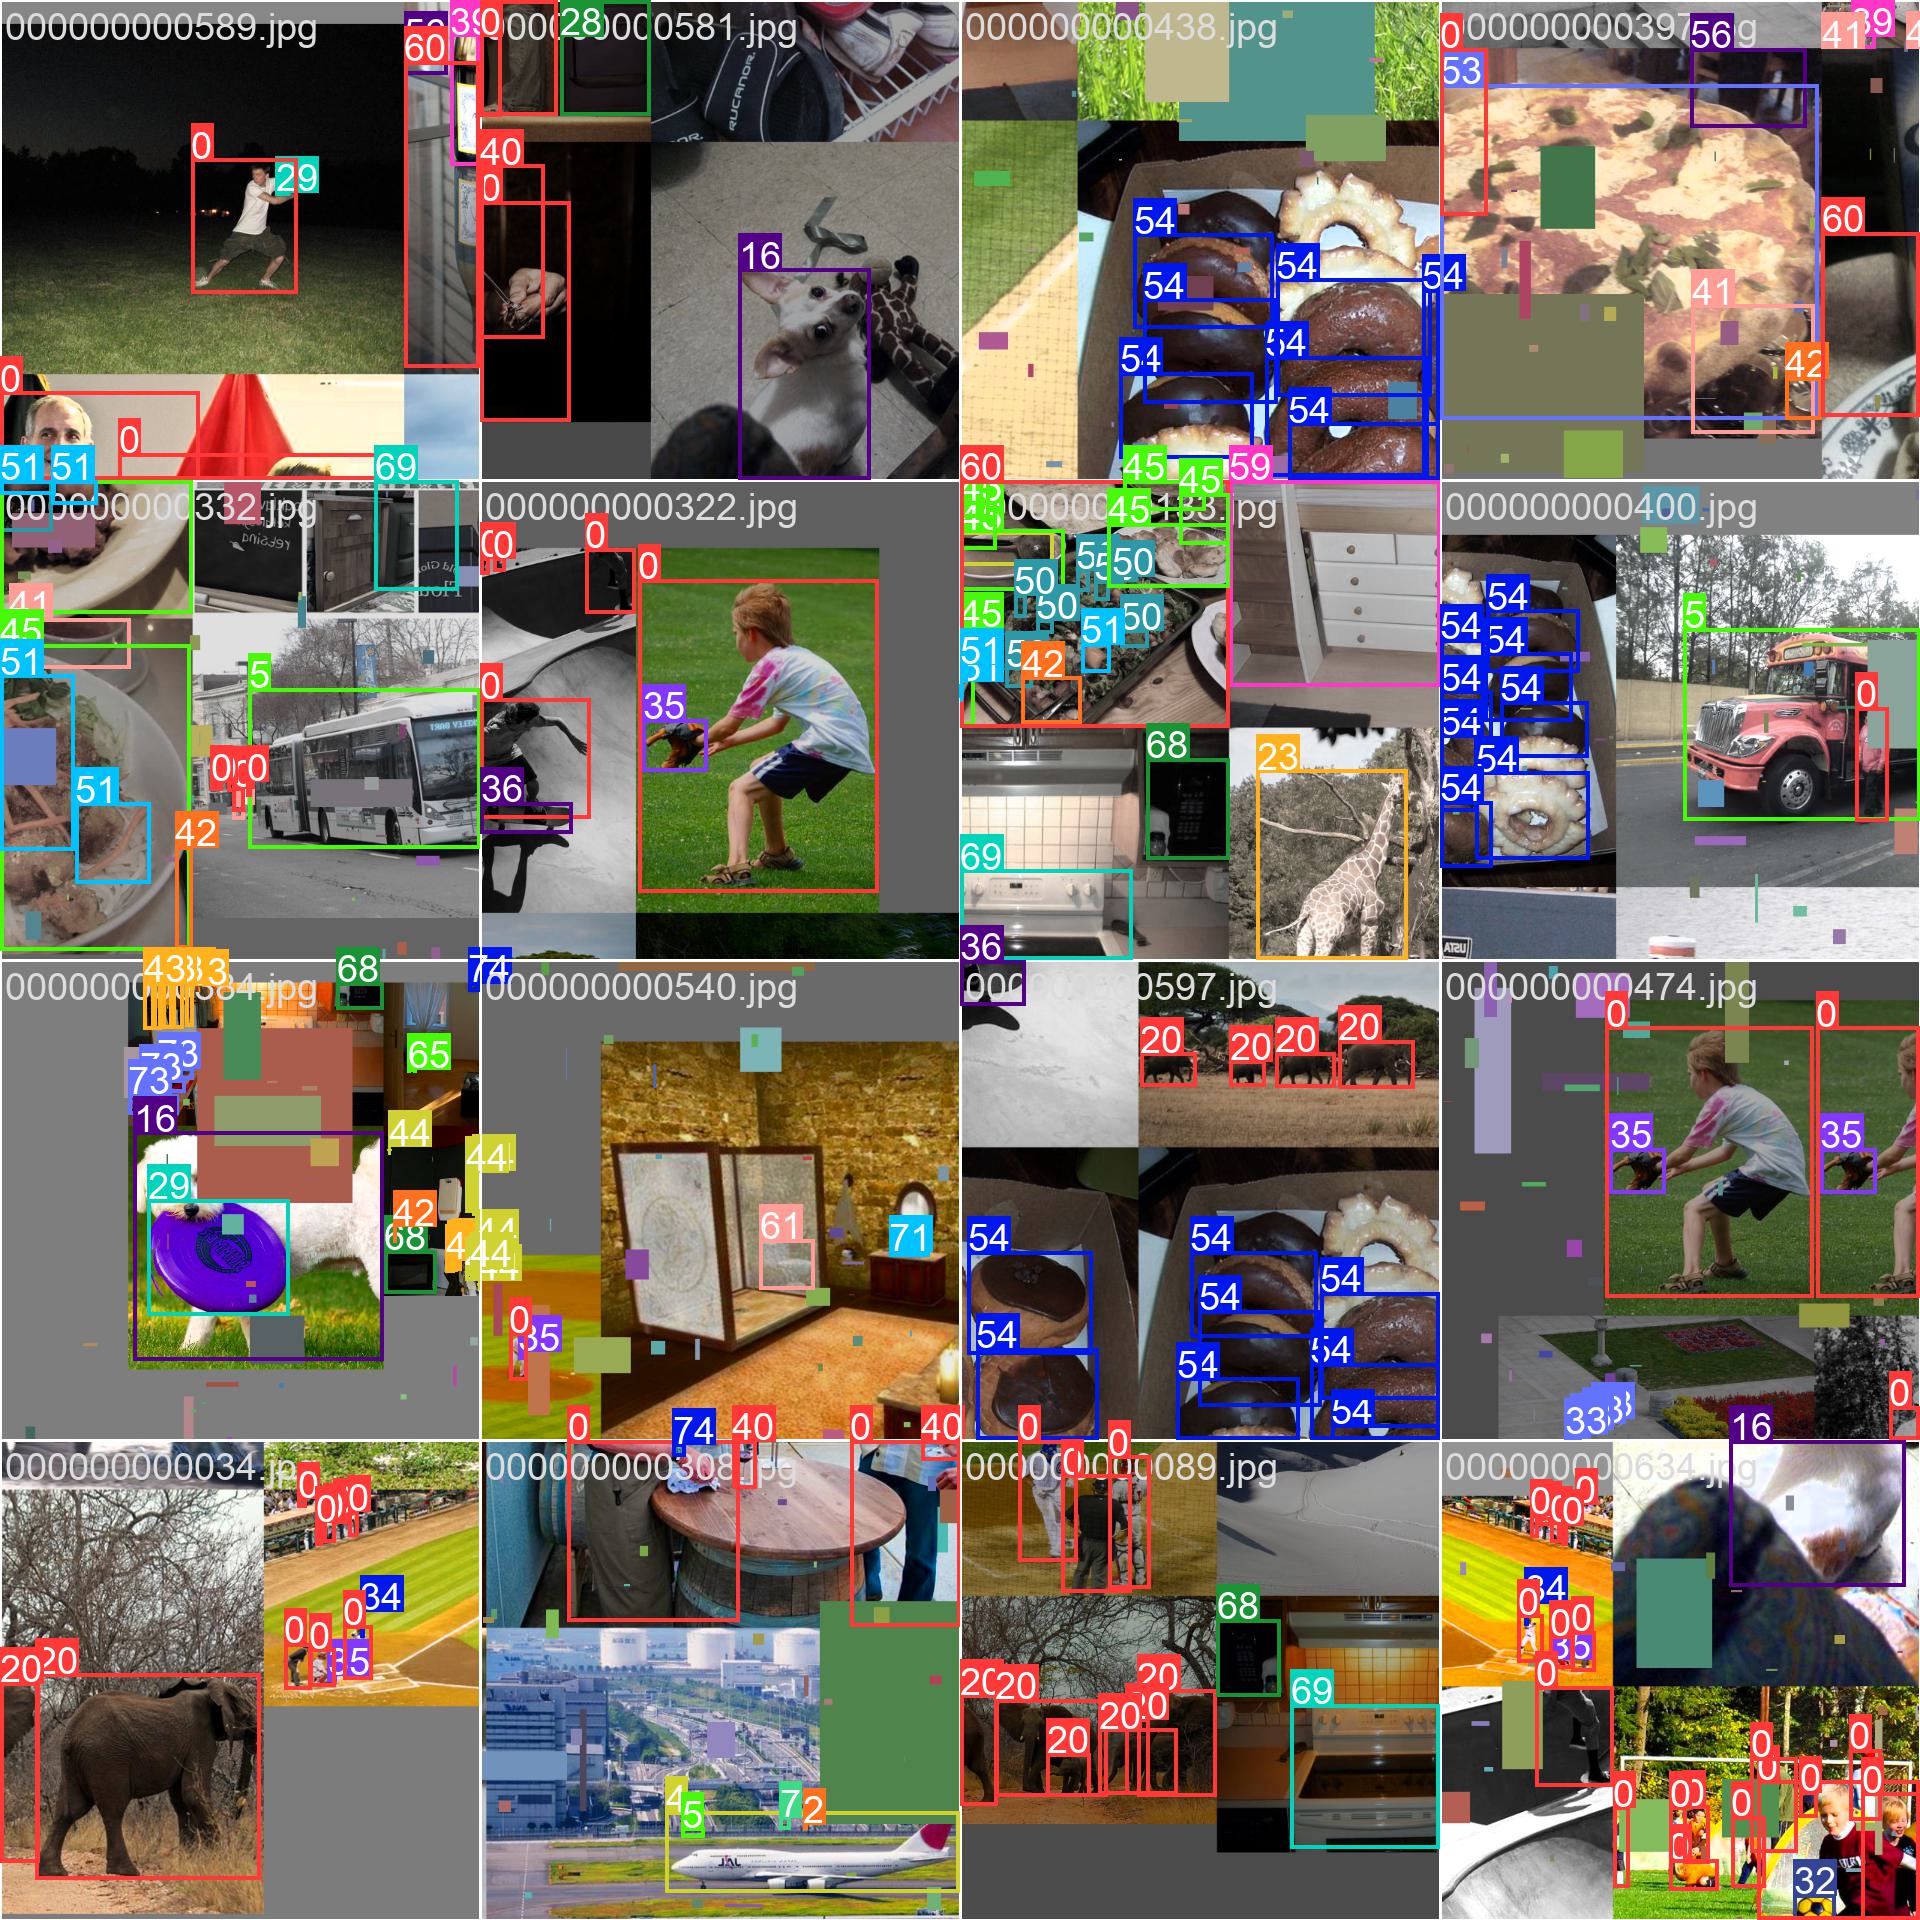
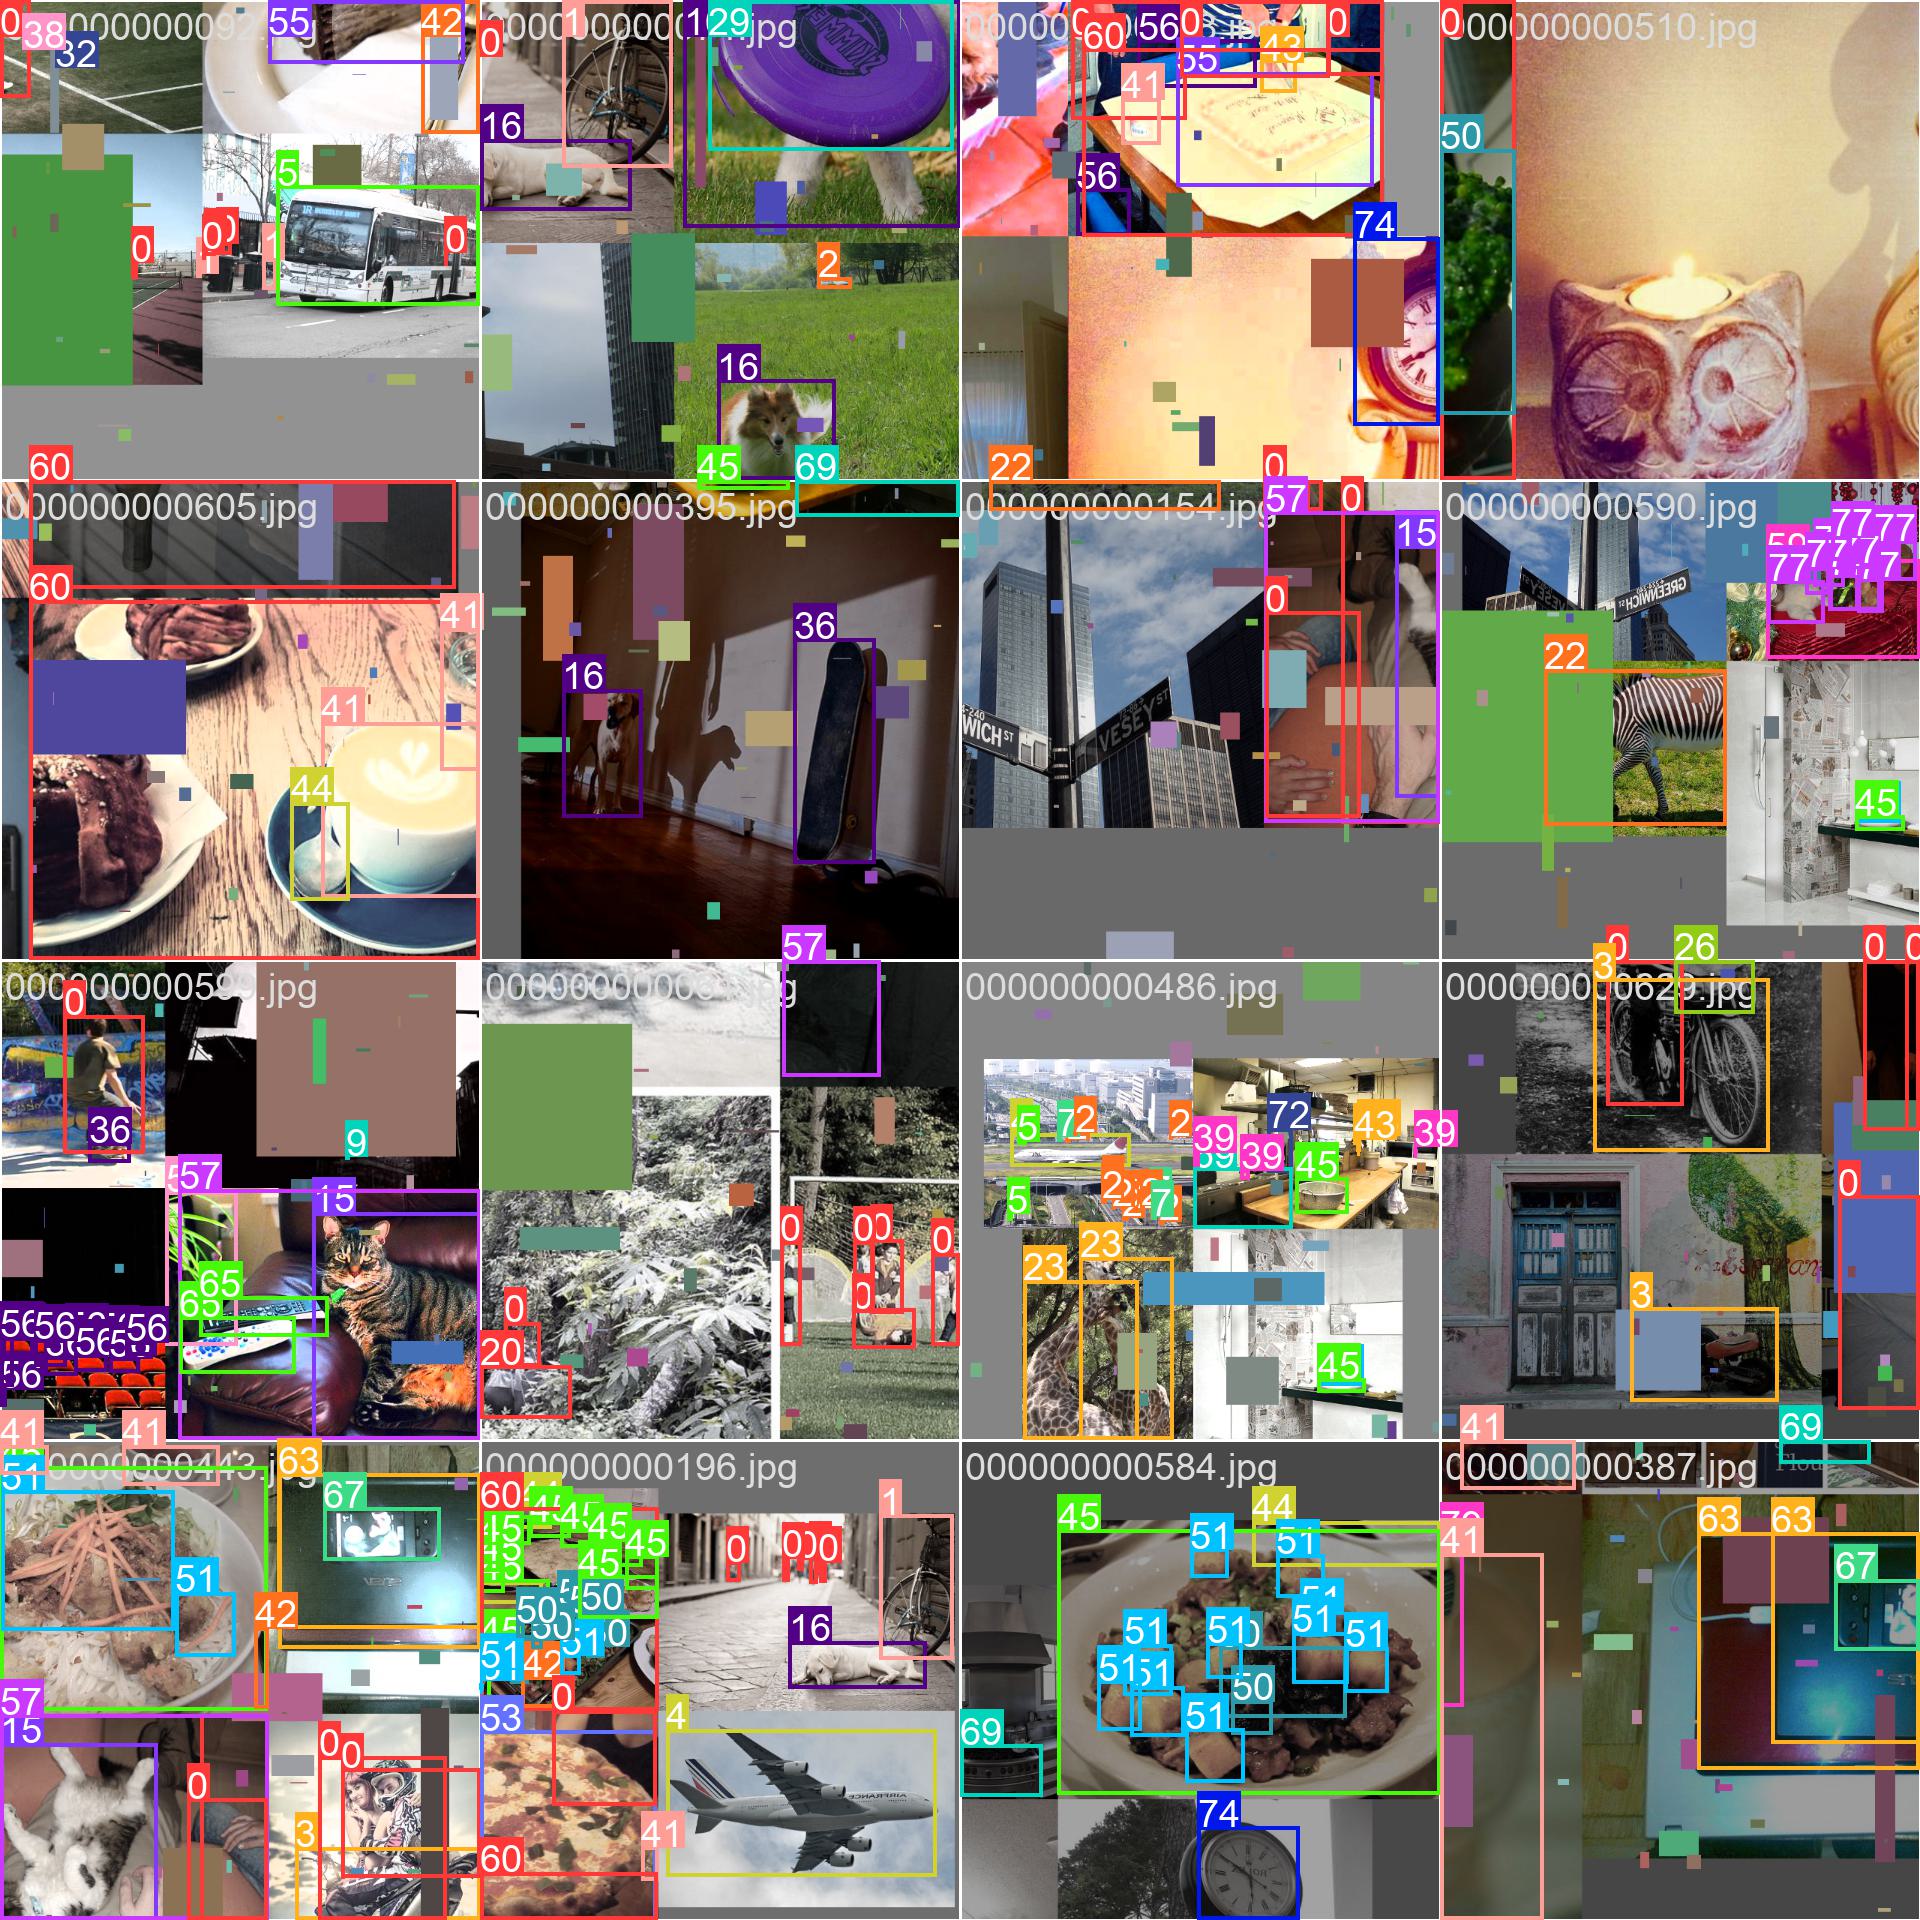
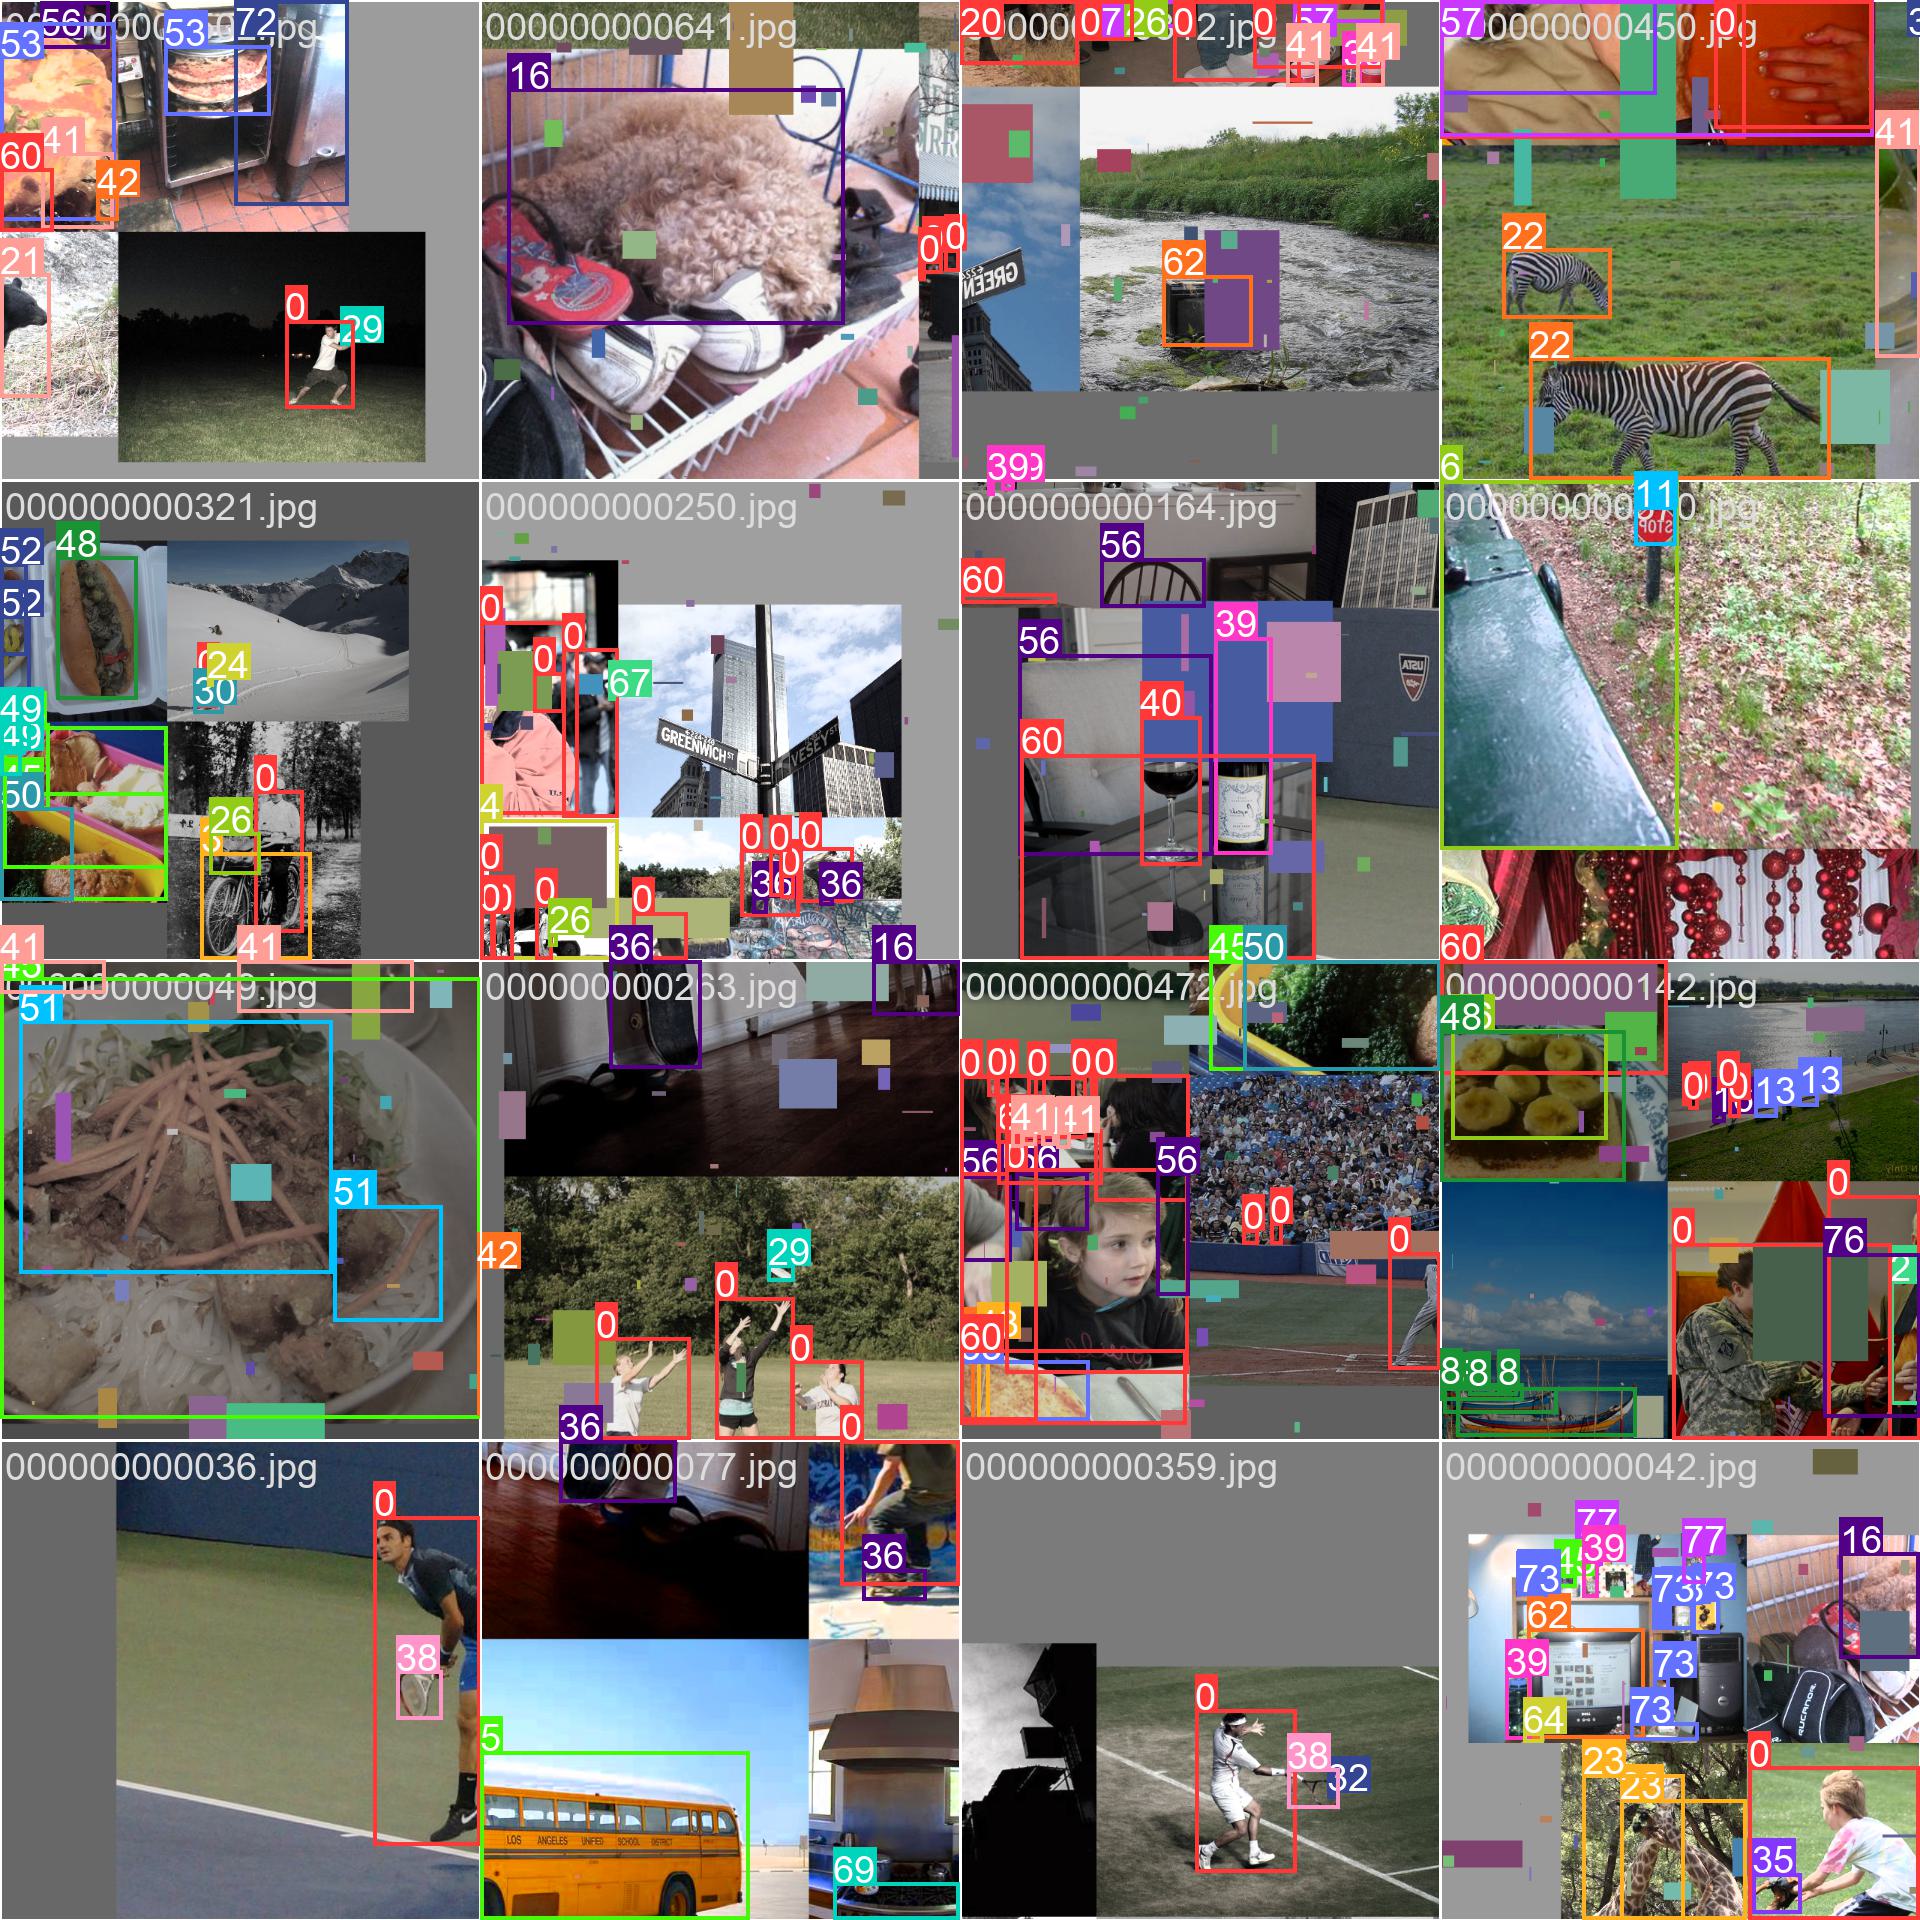
Cutout이 들어갔는데 세부 코드를 설정하지 않아서 그런지 색깔도 들어갔고, 제일 중요한건 코드의 순서가 아마도 Mosaic처리를 한다음에 Cutout이 들어간 것 같더라구요. 그 부분은 차차 해결을 해주어야할 것 같습니다. 결국 이렇게 들어간 것을 확인하고 데이터셋도 간단하겠다 300회 돌려봤는데 cutout으로 효과를 보는지는 확인하지 못했네요. 이 부분은 좀 더 생각을 해봐야할 것 같습니다. cutout의 확률을 이리 저리 돌려보는것도 좋은 방법이 될 것 같네요.
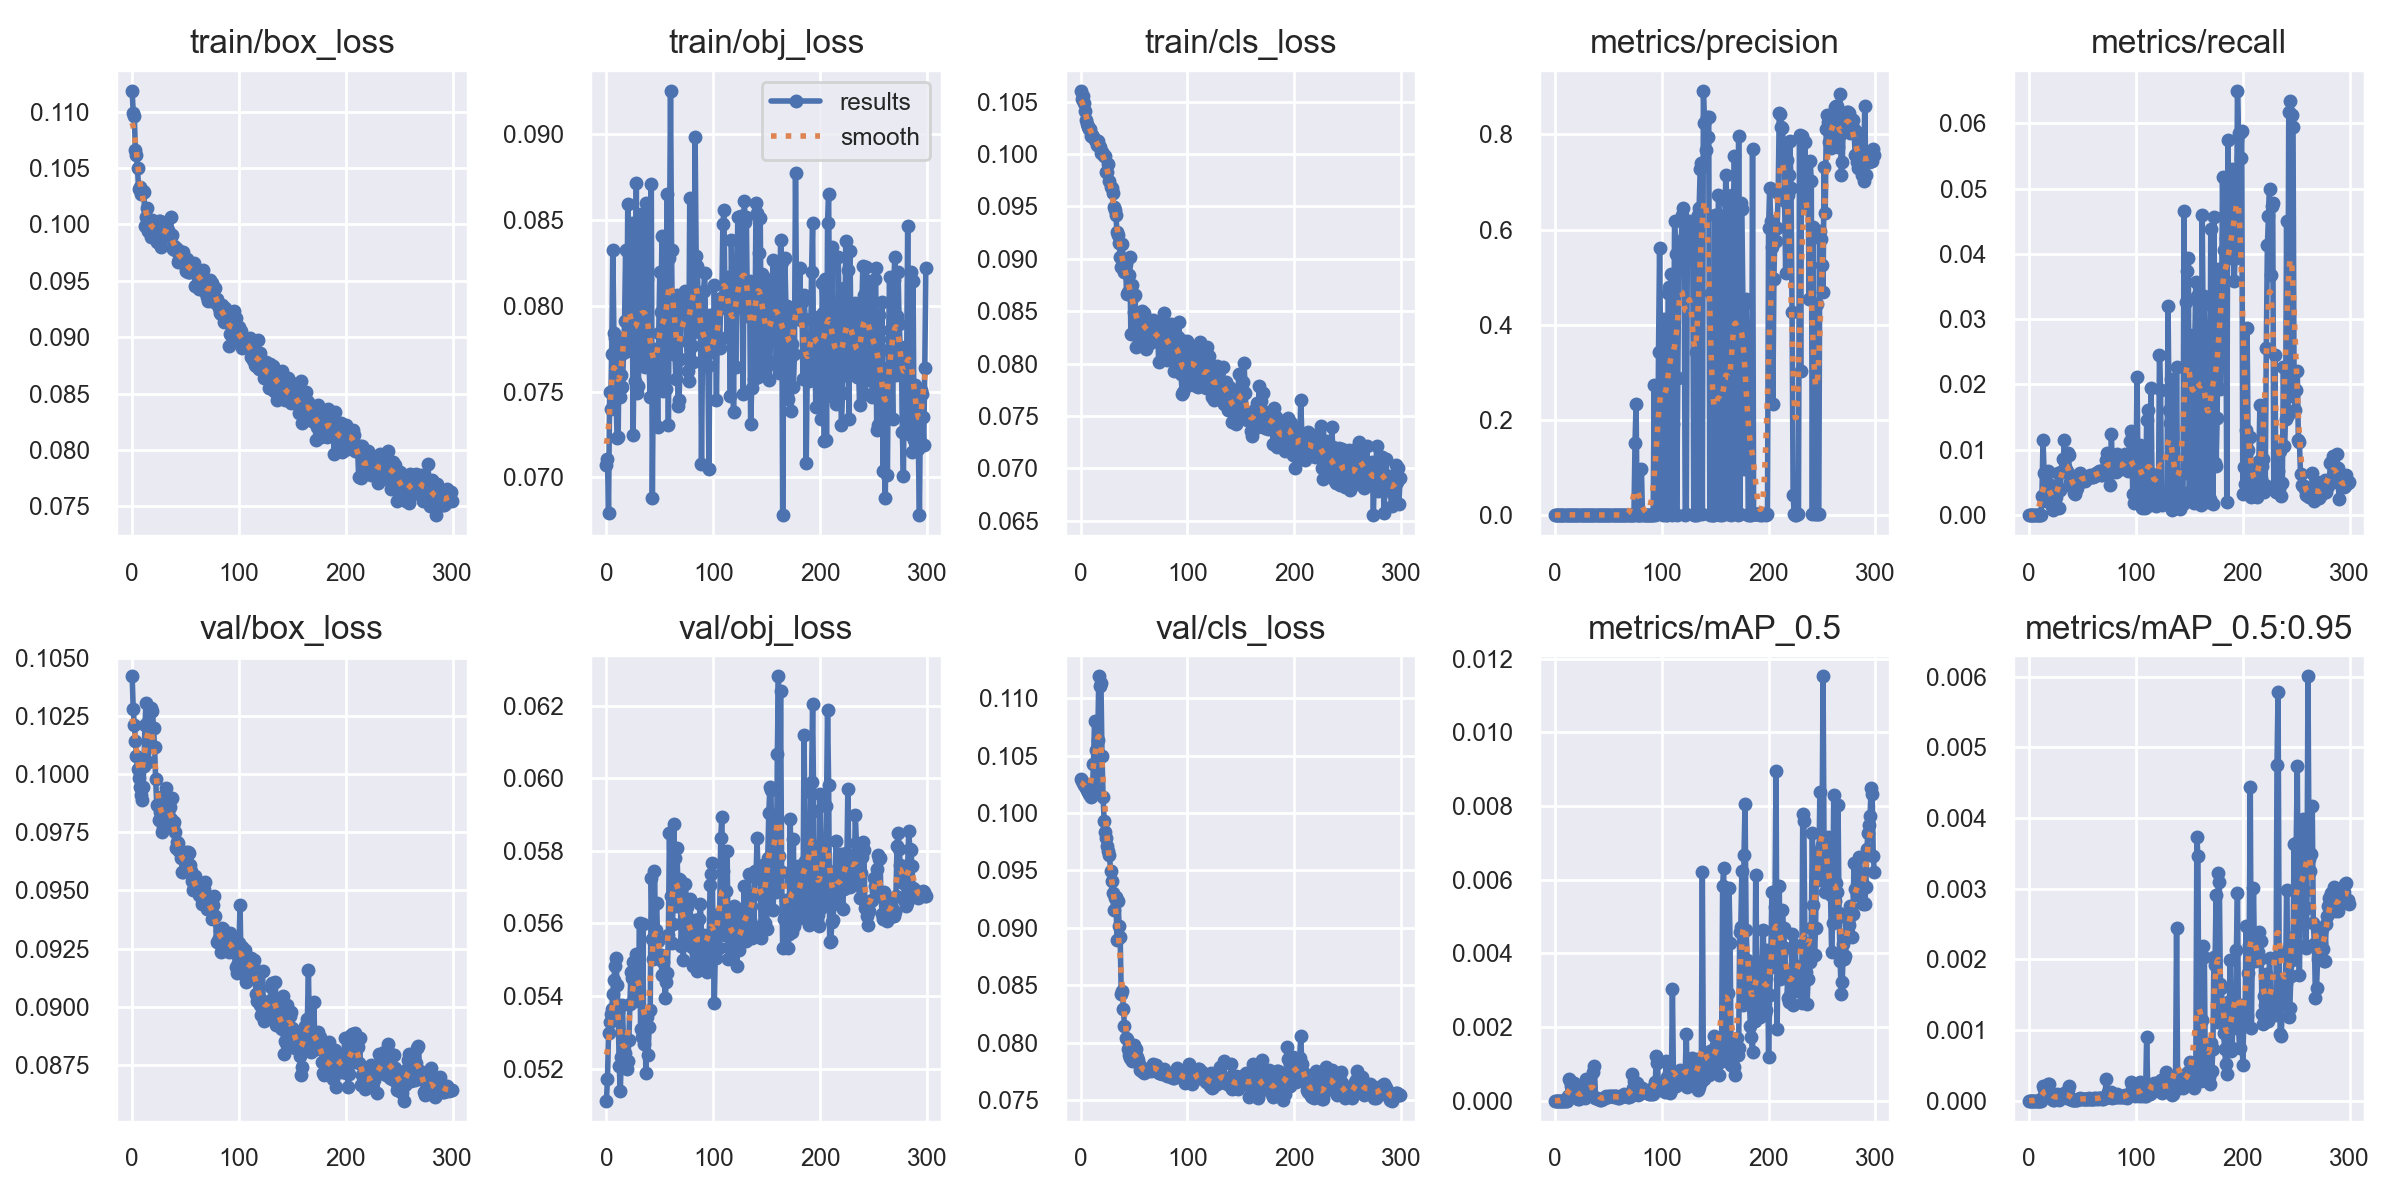
성능이 별로 안좋았기 때문에..
결국 그래서 해결해봐야할 것은
1. Cutout을 Mosaic전에 적용해보기 / 2. 더 큰 Dataset으로 같은 방법 다시 시도해보기 .
정도 있을 것 같네요.
'Deep Learning' 카테고리의 다른 글
| Paper Review: A Simple Framework for Contrastive Learning of Visual Representations (0) | 2024.02.10 |
|---|---|
| Yolo V5 Gridmask Augmentation (2) | 2024.02.07 |
| Paper Review: Speech2Face: Learning the Face behind a Voice(IEEE 2019) (0) | 2024.01.29 |
| Paper Review: ViLBERT: Pretraining Task-Agnostic VisiolinguisticRepresentations for Vision-and-Language Tasks (0) | 2024.01.21 |
| Yolo V5 Validation. (0) | 2024.01.15 |